Skip to content
FOBplans

Single structure · Solo · 13 supplies · Small hammer

How to build the Sandbag Wall

Placement, protection and cost of the Sandbag Wall: 10 supplies on the menu, small hammer, no FOB needed.

Data only· Patch 0.11· Sep 18, 2026Updated Sep 18, 2026
  • 1–2 Players
  • Small hammer
  • No FOB needed
  • 3 min
  • Support · placer
Build modeDownload PNG
Generated preview1 cell = 1.5 m
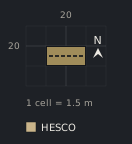
Blueprint, top-down view1 pieces on a 4 × 3 cell grid (1 cell = 1.5 m).2020Sandbag Wall (19,20)1 cell = 1.5 mHESCO
10 menu · ≈13
Show as table
#Structurex,yzPhase
sandbag-wallSandbag Wall19,2001

Cost

Menu
10 supplies
≈ To finish
≈13
Cash per match
$630
One-time unlocks
$35,000
Builders
1

Parts list

StructureQtyEachMenu≈ To finishHammer
Phase 01 · 10 → ≈13
Sandbag Wall11010≈13Small hammer
Total110≈13Small hammer

Build phases

Quick to build waist-height cover. Does not require a FOB. LMG rest, step-up and parapet on tower windows and catwalks. Destroying an enemy sandbag wall pays $100.

Phase 01

Place and build

Open the radial (right mouse + F), page with F until you find the Sandbag Wall, place it with a green hologram and hammer the yellow X markers. Quick to build waist-height cover. Does not require a FOB.

In-game proof

No in-game proof yet. Built it? Send a screenshot.

Sources

  • skycoach-building
  • wardogsbuilder
  • wardogs-zone-db
  • wardogshub-uk
  • Verified on Sep 18, 2026, Patch 0.11 · Methodology

Any · Flat · Defensive

Related blueprints

Blueprint, top-down view58 pieces on a 17 × 26 cell grid (1 cell = 1.5 m).Barbed Wire (24,22)Barbed Wire (26,22)Barbed Wire (28,22)Barbed Wire (30,22)Barbed Wire (32,22)Barbed Wire (34,22)Barbed Wire (22,24)HESCO Wall (24,24)2HESCO Wall (28,24)2HESCO Wall (32,24)2HESCO Block (Large) (36,24)2HESCO Wall (24,25)2HESCO Block (Large) (28,25)2HESCO Block (Large) (29,25)2HESCO Block (Large) (30,25)2HESCO Block (Large) (31,25)2HESCO Block (Large) (32,25)2HESCO Wall (36,25)2Barbed Wire (22,26)HESCO Block (Large) (28,26)2Forward Operating Base (29,26)FOB9HESCO Block (Large) (32,26)2Door (28,27)2HESCO Block (Large) (32,27)2Barbed Wire (22,28)HESCO Block (Large) (28,28)2HESCO Block (Large) (32,28)2HESCO Wall (24,29)2HESCO Block (Large) (28,29)2HESCO Block (Large) (29,29)2HESCO Block (Large) (30,29)2HESCO Block (Large) (31,29)2HESCO Block (Large) (32,29)2HESCO Block (Large) (36,29)2Barbed Wire (22,30)HESCO Block (Large) (36,30)2HESCO Wall (27,31)2Gate (28,31)2HESCO Wall (32,31)2HESCO Block (Large) (36,31)2Barbed Wire (22,32)Door (36,32)2HESCO Block (Large) (24,33)2HESCO Block (Large) (36,33)2Barbed Wire (22,34)HESCO Block (Large) (24,34)2HESCO Block (Large) (36,34)2HESCO Block (Large) (24,35)2HESCO Block (Large) (27,35)2HESCO Block (Large) (32,35)2HESCO Block (Large) (36,35)2HESCO Wall (24,36)2Gate (28,36)2HESCO Wall (32,36)2HESCO Block (Large) (36,36)2Hedgehog (25,39)Hedgehog (31,39)Hedgehog (28,41)1 cell = 1.5 m
Duo · 2–3 Players · Medium hammer

Duo FOB Core with Vehicle Gate Airlock

Two players, one truck: a boxed console inside a 13×13 ring with a two-gate vehicle airlock, slalom and wire. The base every logistics run starts from.

1,086 → ≈1,448 · 1 pallets · $8,020

Blueprint, top-down view55 pieces on a 17 × 21 cell grid (1 cell = 1.5 m).Barbed Wire (24,22)Barbed Wire (26,22)Barbed Wire (28,22)Barbed Wire (30,22)Barbed Wire (32,22)Barbed Wire (34,22)HESCO Wall (24,24)2HESCO Wall (28,24)2HESCO Wall (32,24)2HESCO Block (Large) (36,24)2Barbed Wire (38,24)HESCO Wall (24,25)2Recon Tower (25,25)5HESCO Block (Large) (29,25)2HESCO Wall (36,25)2Door (30,26)2Barbed Wire (38,26)HESCO Block (Large) (30,27)2HESCO Block (Large) (29,28)2Barbed Wire (38,28)HESCO Block (Large) (24,29)2HESCO Wall (36,29)2HESCO Block (Large) (24,30)2HESCO Block (Large) (28,30)2HESCO Block (Large) (29,30)2HESCO Block (Large) (30,30)2HESCO Block (Large) (31,30)2HESCO Block (Large) (32,30)2Barbed Wire (38,30)HESCO Block (Large) (24,31)2HESCO Block (Large) (28,31)2Forward Operating Base (29,31)FOB9HESCO Block (Large) (32,31)2Door (24,32)2HESCO Block (Large) (28,32)2HESCO Block (Large) (32,32)2Barbed Wire (38,32)HESCO Block (Large) (24,33)2HESCO Block (Large) (28,33)2HESCO Block (Large) (32,33)2HESCO Block (Large) (36,33)2HESCO Block (Large) (24,34)2HESCO Block (Large) (28,34)2HESCO Block (Large) (29,34)2Door (30,34)2HESCO Block (Large) (31,34)2HESCO Block (Large) (32,34)2HESCO Block (Large) (36,34)2Barbed Wire (38,34)HESCO Block (Large) (24,35)2HESCO Block (Large) (36,35)2HESCO Wall (24,36)2HESCO Wall (28,36)2HESCO Wall (32,36)2HESCO Block (Large) (36,36)21 cell = 1.5 m
Duo · 2–3 Players · Large hammer

Duo Overwatch Tower with Ladder Kill Box

A Recon Tower in the corner of a 13×13 ring, its ladder boxed with blocks and a door, wire on the blind faces. Two Support players, one with the Large hammer.

983 → ≈1,311 · 1 pallets · $10,420

Blueprint, top-down view20 pieces on a 13 × 13 cell grid (1 cell = 1.5 m).HESCO Wall (15,15)2HESCO Wall (19,15)2HESCO Block (Large) (23,15)2HESCO Block (Large) (24,15)2HESCO Block (Large) (25,15)2HESCO Wall (15,16)2HESCO Wall (25,16)2Forward Operating Base (19,19)FOB9HESCO Wall (15,20)2HESCO Block (Large) (25,20)2HESCO Block (Large) (25,21)2HESCO Block (Large) (25,22)2Door (25,23)2HESCO Block (Large) (15,24)2HESCO Block (Large) (25,24)2HESCO Wall (15,25)2HESCO Wall (19,25)2HESCO Block (Large) (23,25)2HESCO Block (Large) (24,25)2HESCO Block (Large) (25,25)21 cell = 1.5 m
Duo · 2–4 Players · Medium hammer

11×11 HESCO ring

The standard perimeter: seven walls, eleven large blocks and one door around an 11×11 footprint, 490 supplies on the menu.

490 → ≈653 · 1 pallets · $7,500

DefensiveData only
Blueprint, top-down view6 pieces on a 11 × 6 cell grid (1 cell = 1.5 m).HESCO Block (Large) (23,18)2Recon Tower (24,18)5Forward Operating Base (19,19)FOB9Door (22,19)2HESCO Block (Large) (22,20)2HESCO Block (Large) (23,21)21 cell = 1.5 m
Duo · 2–4 Players · Large hammer

Recon tower with ladder kill box

A Recon Tower whose ladder is boxed in with three blocks and a door, so attackers climb single file into your muzzle. 61 + 56 supplies.

117 → ≈156 · 1 pallets · $9,900